Procedural Bubble Shield
Inspiration
This effect was inspired by the bubble shield from Halo 3, initially introduced in this trailer, and later included as an ability in the game. As a lover of sci-fi the shot below from the trailer particularly stood out to me, as it seems to have done for a lot of people given the number of "bubble shield" references across the internet. The appearance of the shield changed fairly significantly when it was implemented in-game, and that's what I've used as my primary source of inspiration.
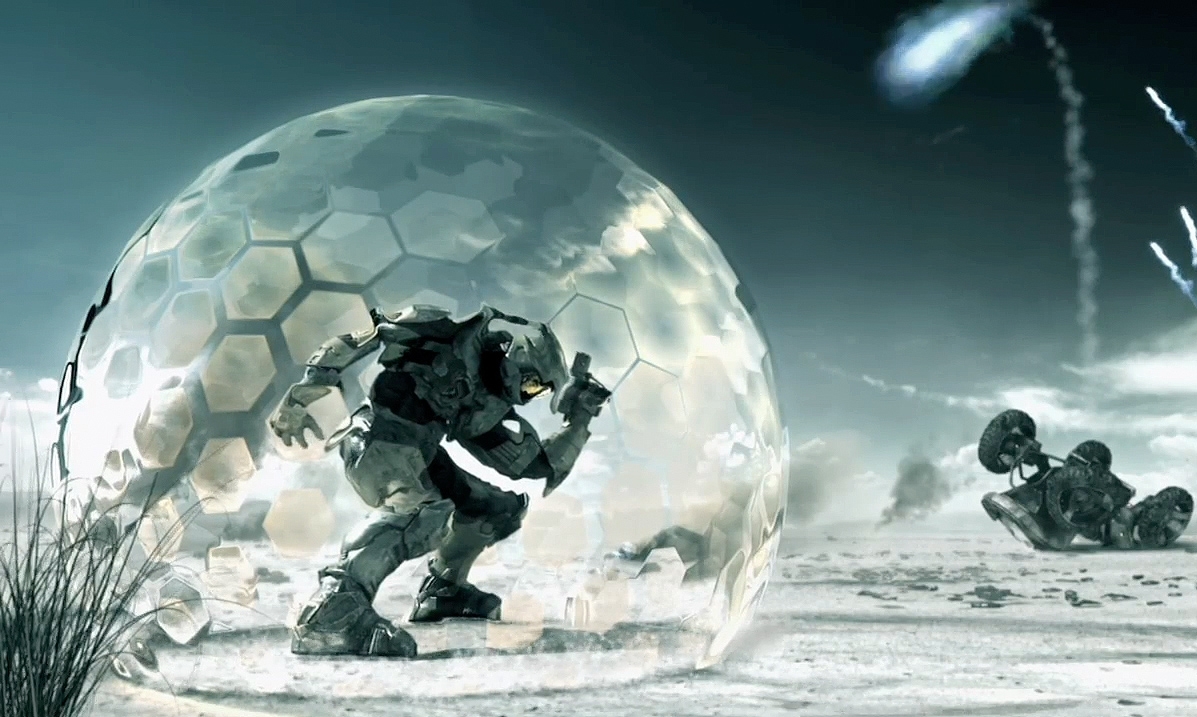
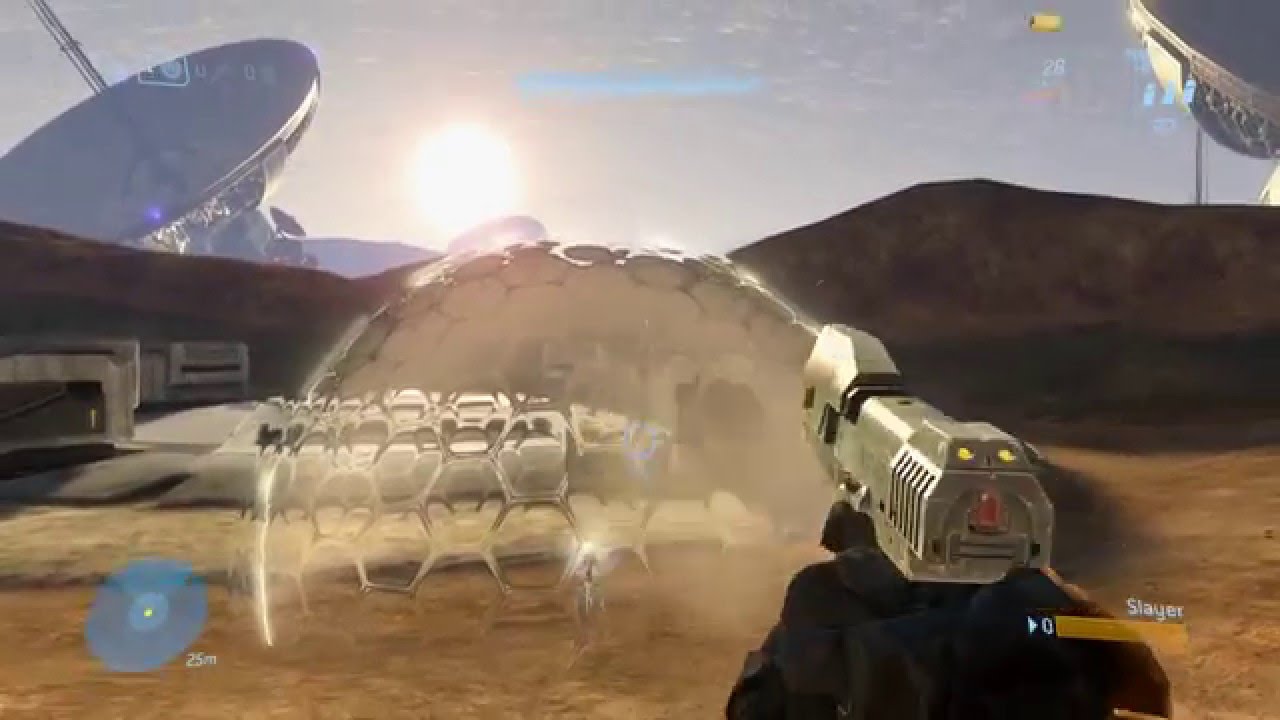
Breaking down the effect you can see a fresnel effect on the lighting around the circumference of the sphere, as well as clear hexagons with refraction around their borders making up the main body of the sphere.
Implementation
I learned a lot from these articles about creating hexagonal spheres and force field effects, however I wanted to build the sphere mesh in Houdini so that I could easily tweak parameters such as the resulting hexagon size, and I also wanted to modify how the effect materialised on screen but more on that later.
Sphere Mesh
The initial sphere was built in Blender using the Geodesic Dome add-on. The add-on gets you most of the way there with a hexagonal sphere mesh, but for managing textures such as for the refraction it'd be useful to have correctly UV mapped triangles as our base polygon. With triangles we can use a simple square texture with a line across the bottom which will end up drawing out the shape of a hexagon (see the example below).
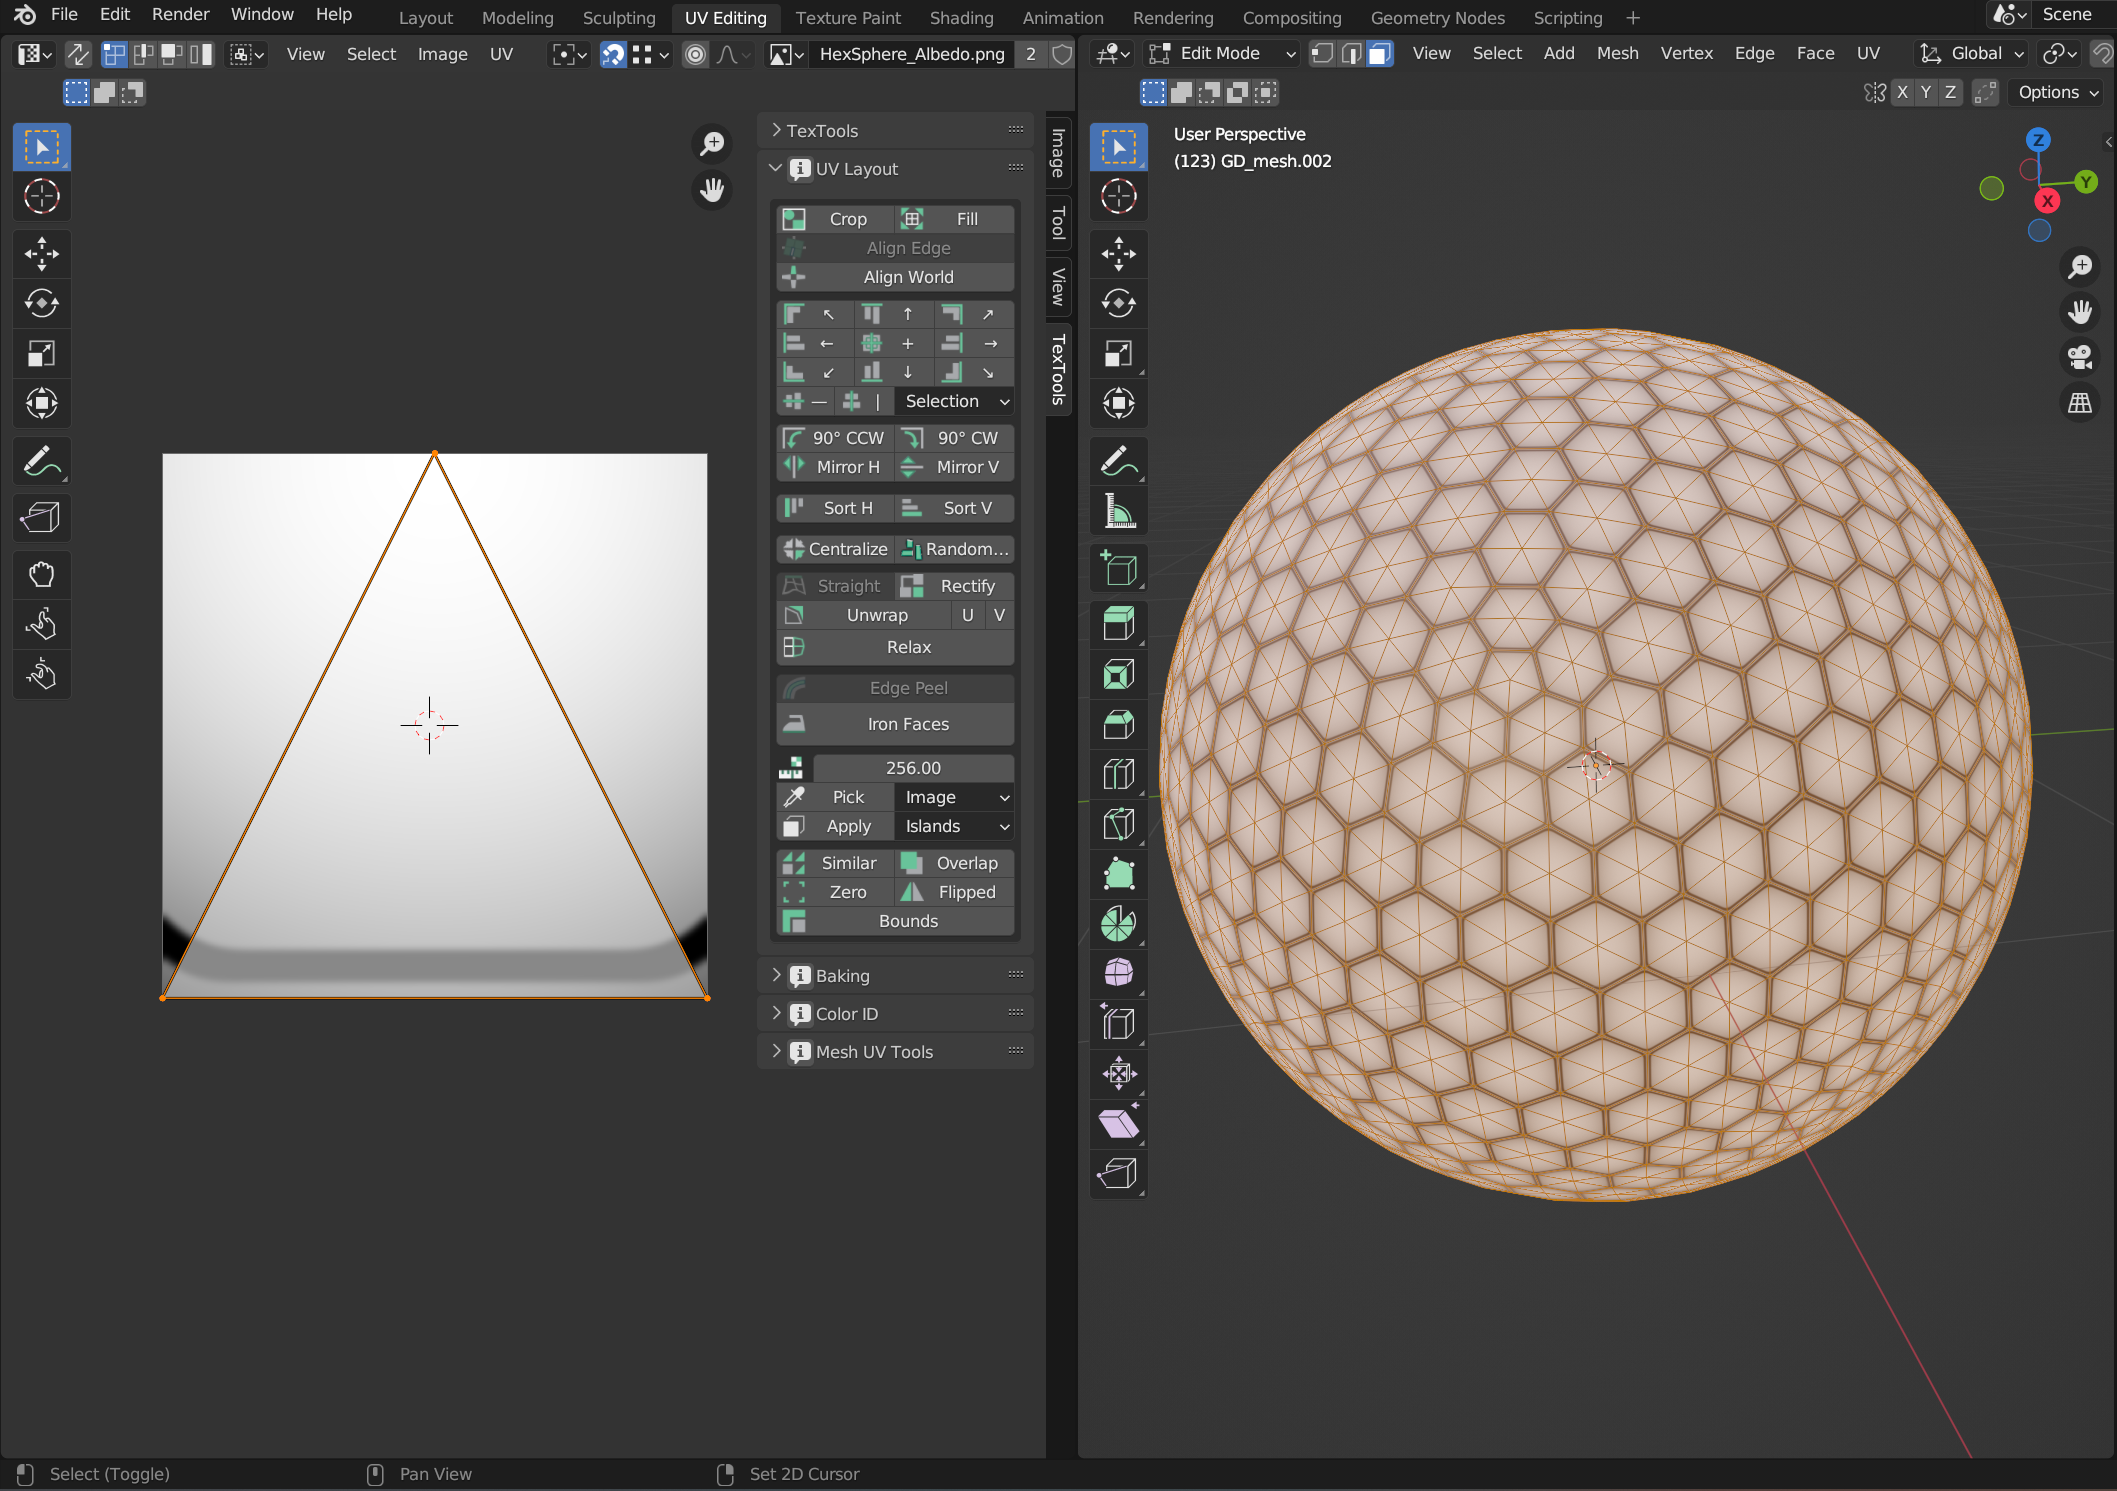
Achieving this in Blender is simple enough with the Poke faces tool, and then using the UV tools to stack every triangle on top of each other in the UV map (the TexTools add-on was a great help here). However if we want to change the original sphere's shape, to tweak the size of the hexagons making up the sphere for example, then we need to manually repeat these steps. Enter Houdini's procedural workflow!
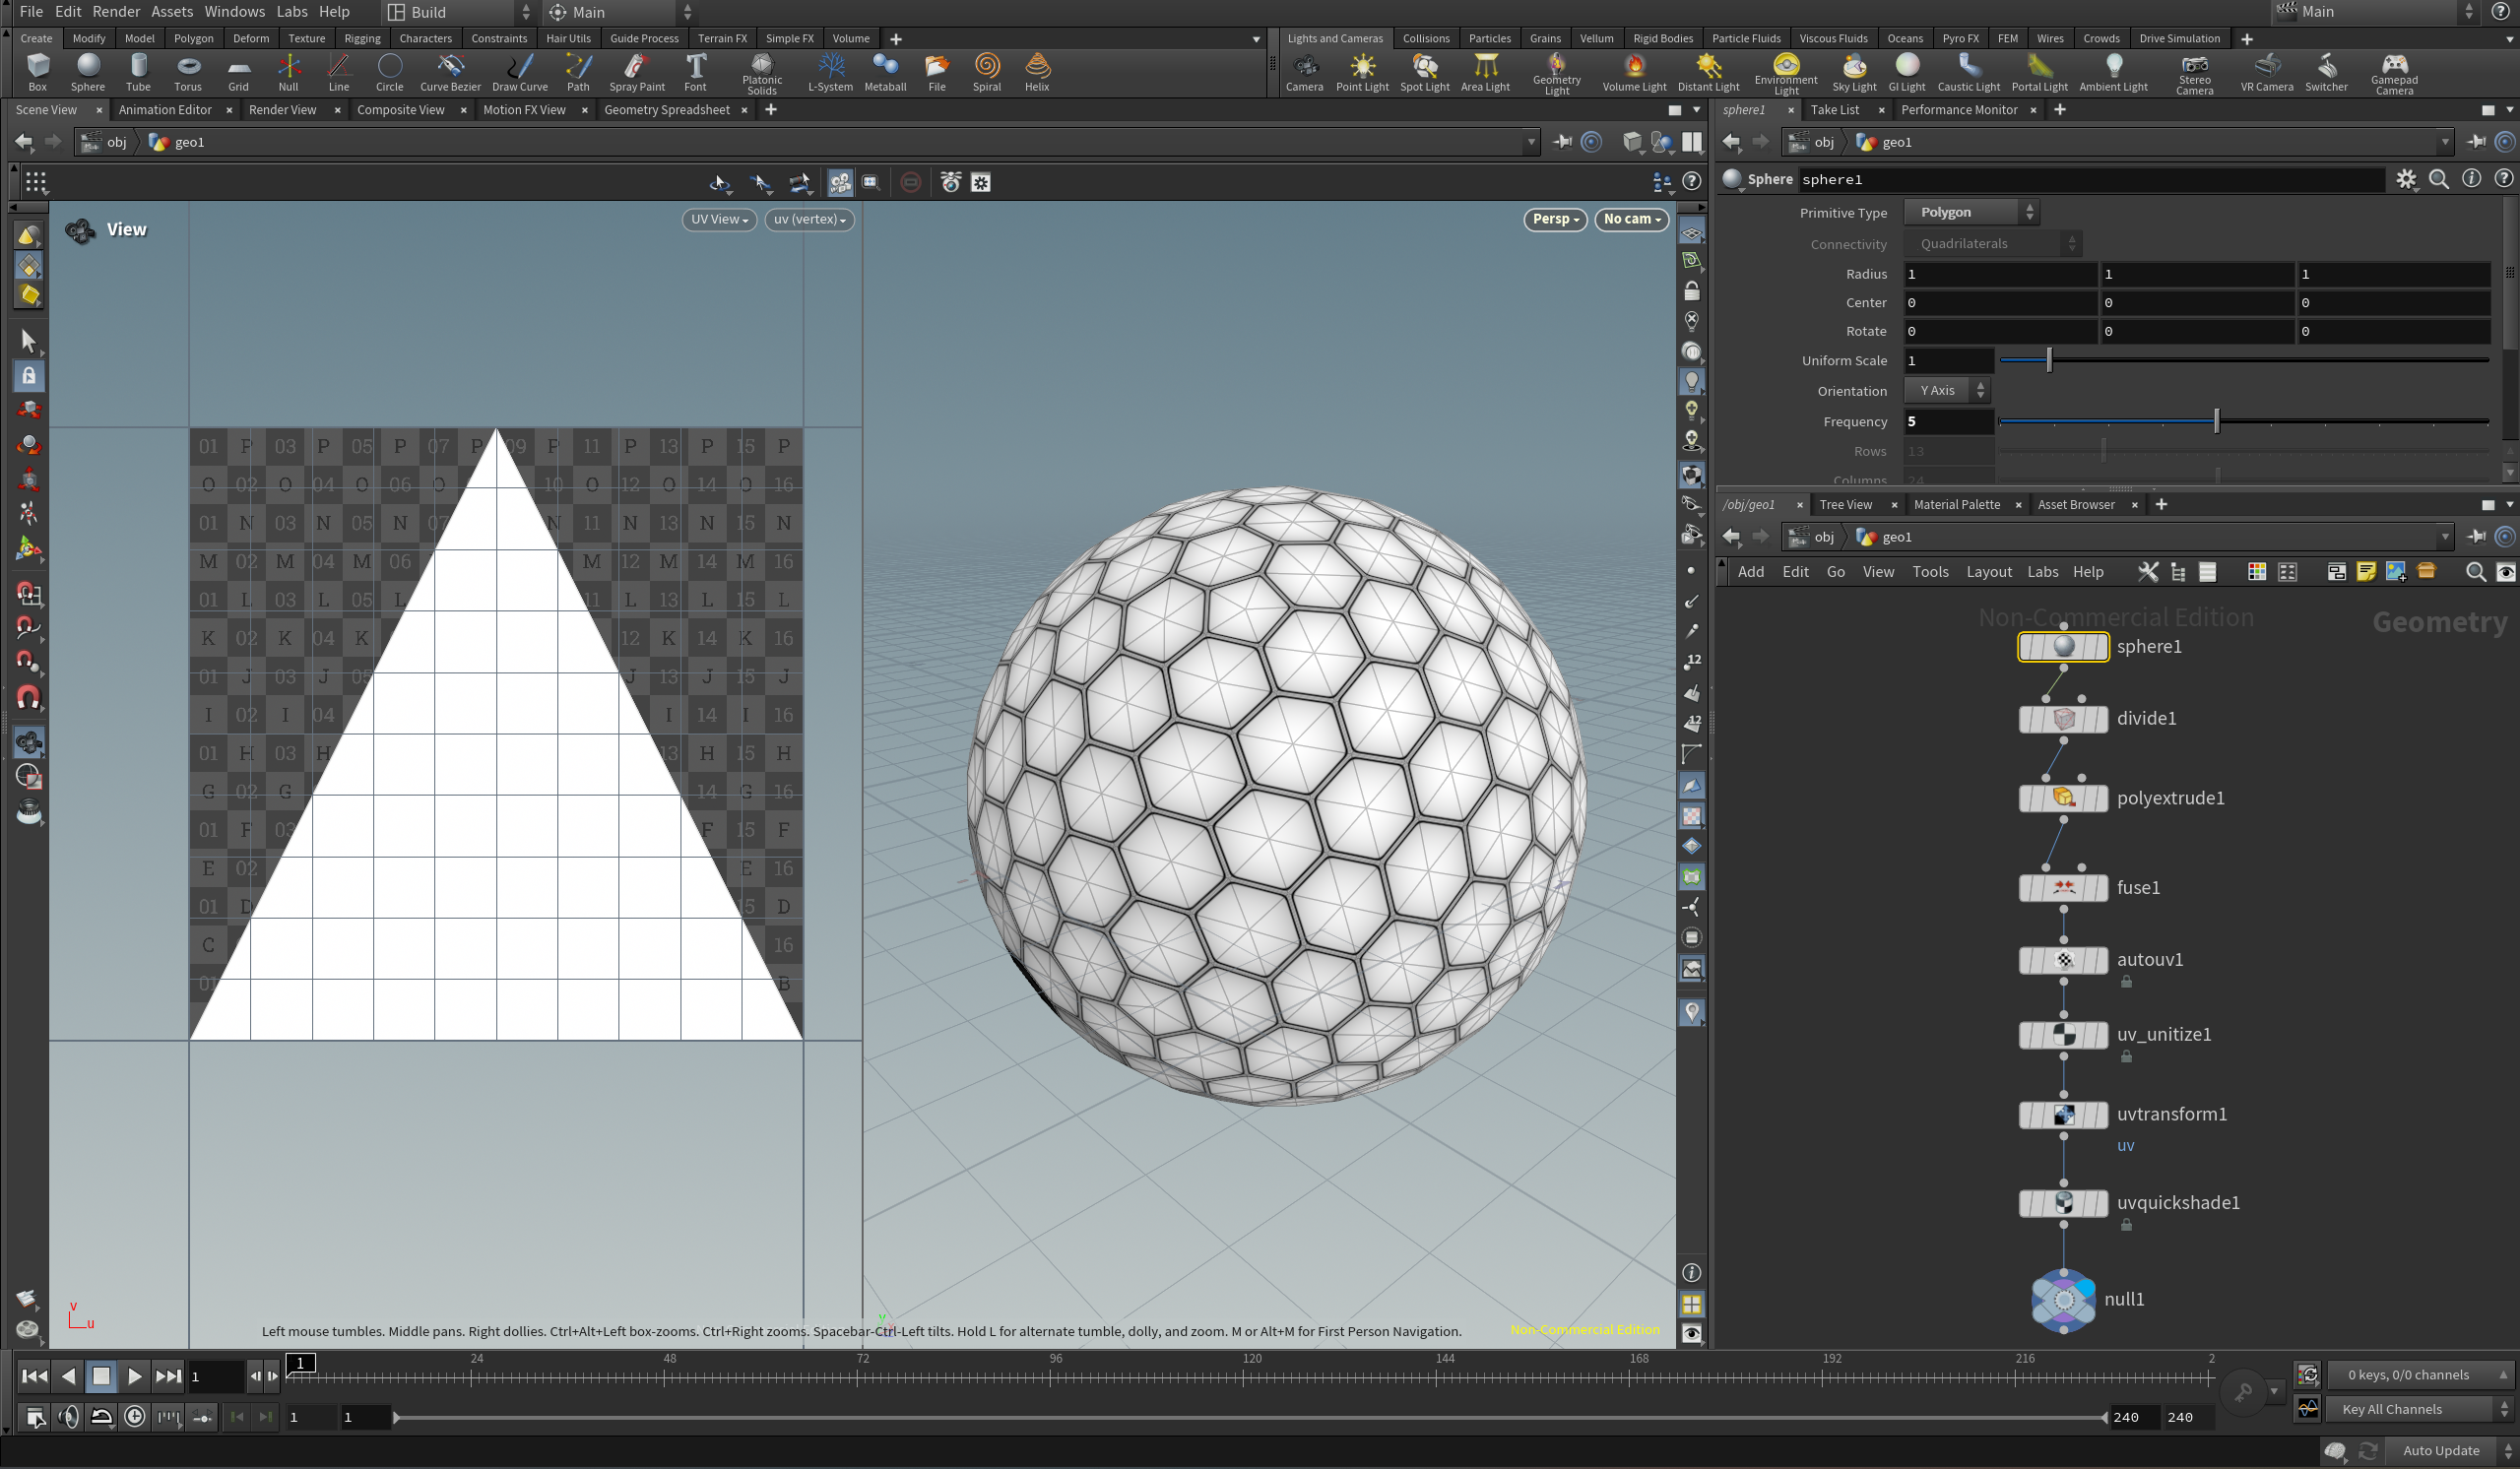
Using Houdini we can instead build up the hexagonal sphere and UV map it using SOP nodes. You can see the node graph below, but the general idea is to:
- Create a polygon sphere.
- Divide the faces with
Compute Dualchecked. - As Houdini has no equivalent to
Poke facesin Blender, we need to then inset every face, scale the inset down to 0, then fuse the new vertices at the centre of each hexagon together in order to get our triangles. - We can then use any kind of automatic UV unwrapping (I've used UV AutoSeam here).
- Thank the Universe for the existence of SideFX Labs.
- Use the UV Unitize SOP from SideFX Labs to stack every face on top of each other, all stretched to maximally fit the UV map.
- Transform the UVs by rotating them and shearing.
Doing all of this we end up with the result below, same as the blender output but now we can tweak the hexagon size as we see fit! You could also make an HDA for use directly in your game engine of choice, allowing tweaking of parameters such as hexagon size directly in-engine.
Sphere Texture
The textures we need for the sphere are a refraction and normal map. You could do this in Photoshop or similar but again I wanted flexibility in order to try out some different effects, so I went for a procedural approach using Substance Designer. The general idea here is to have a slightly blurry black line denoting the strongest area of refraction, which will roughly form the shape of hexagons with rounded edges.



Bubble Material
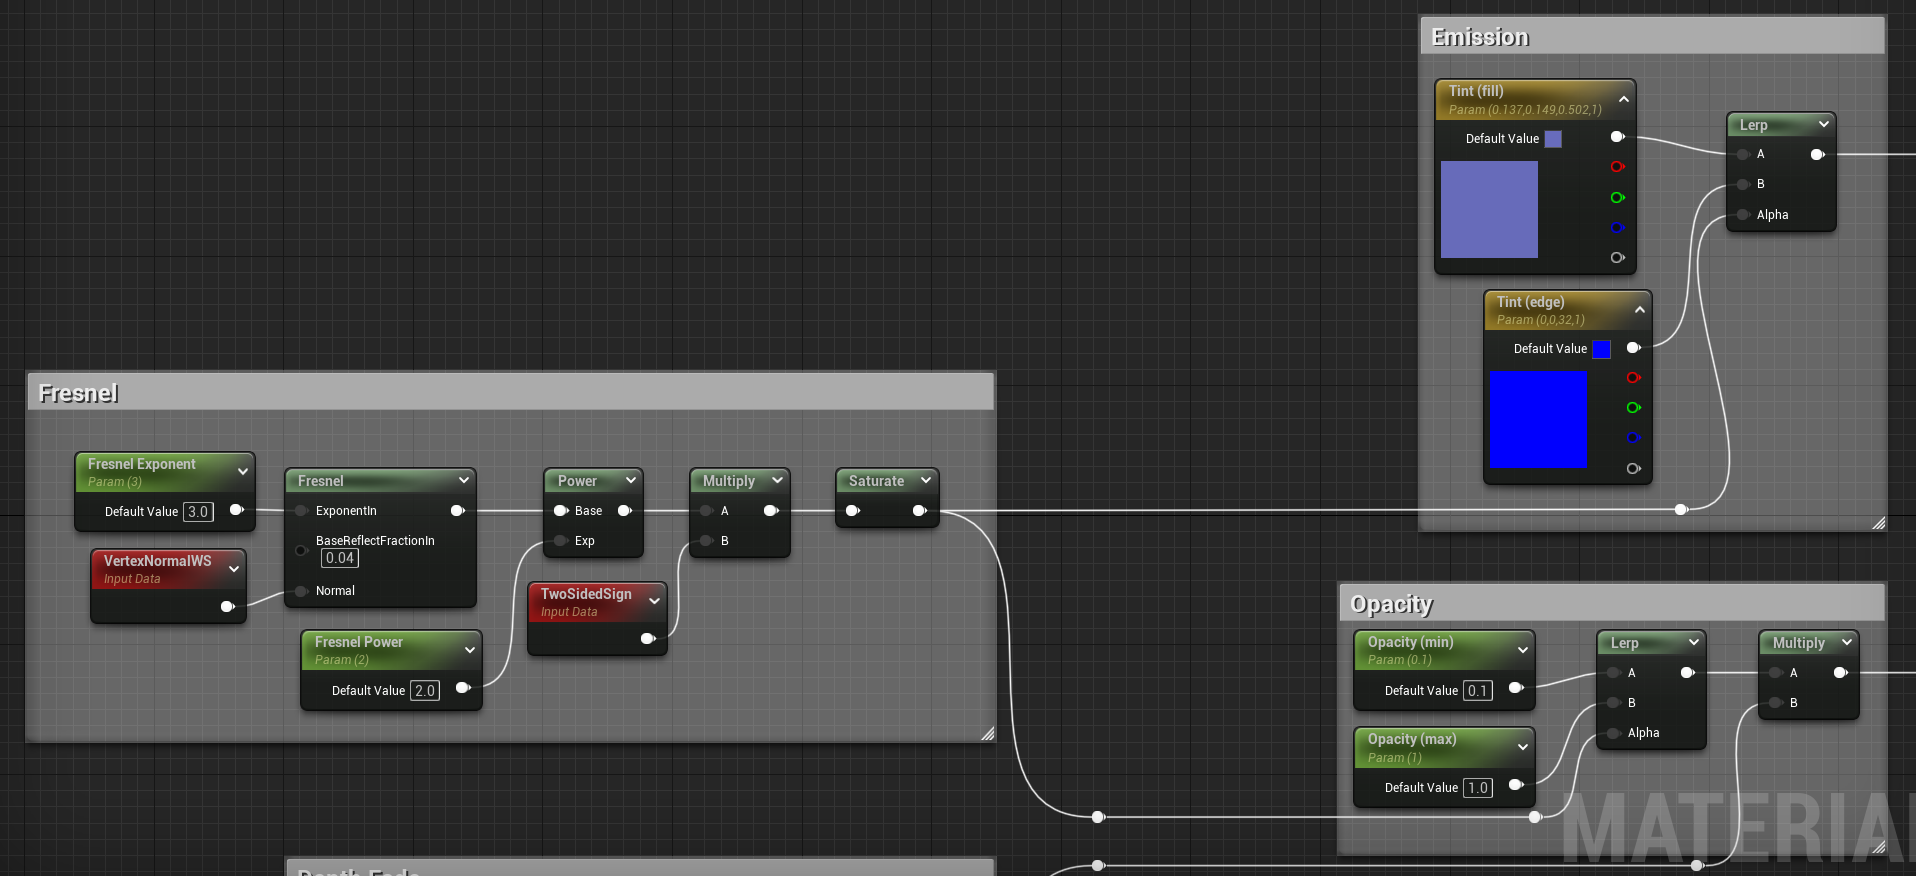
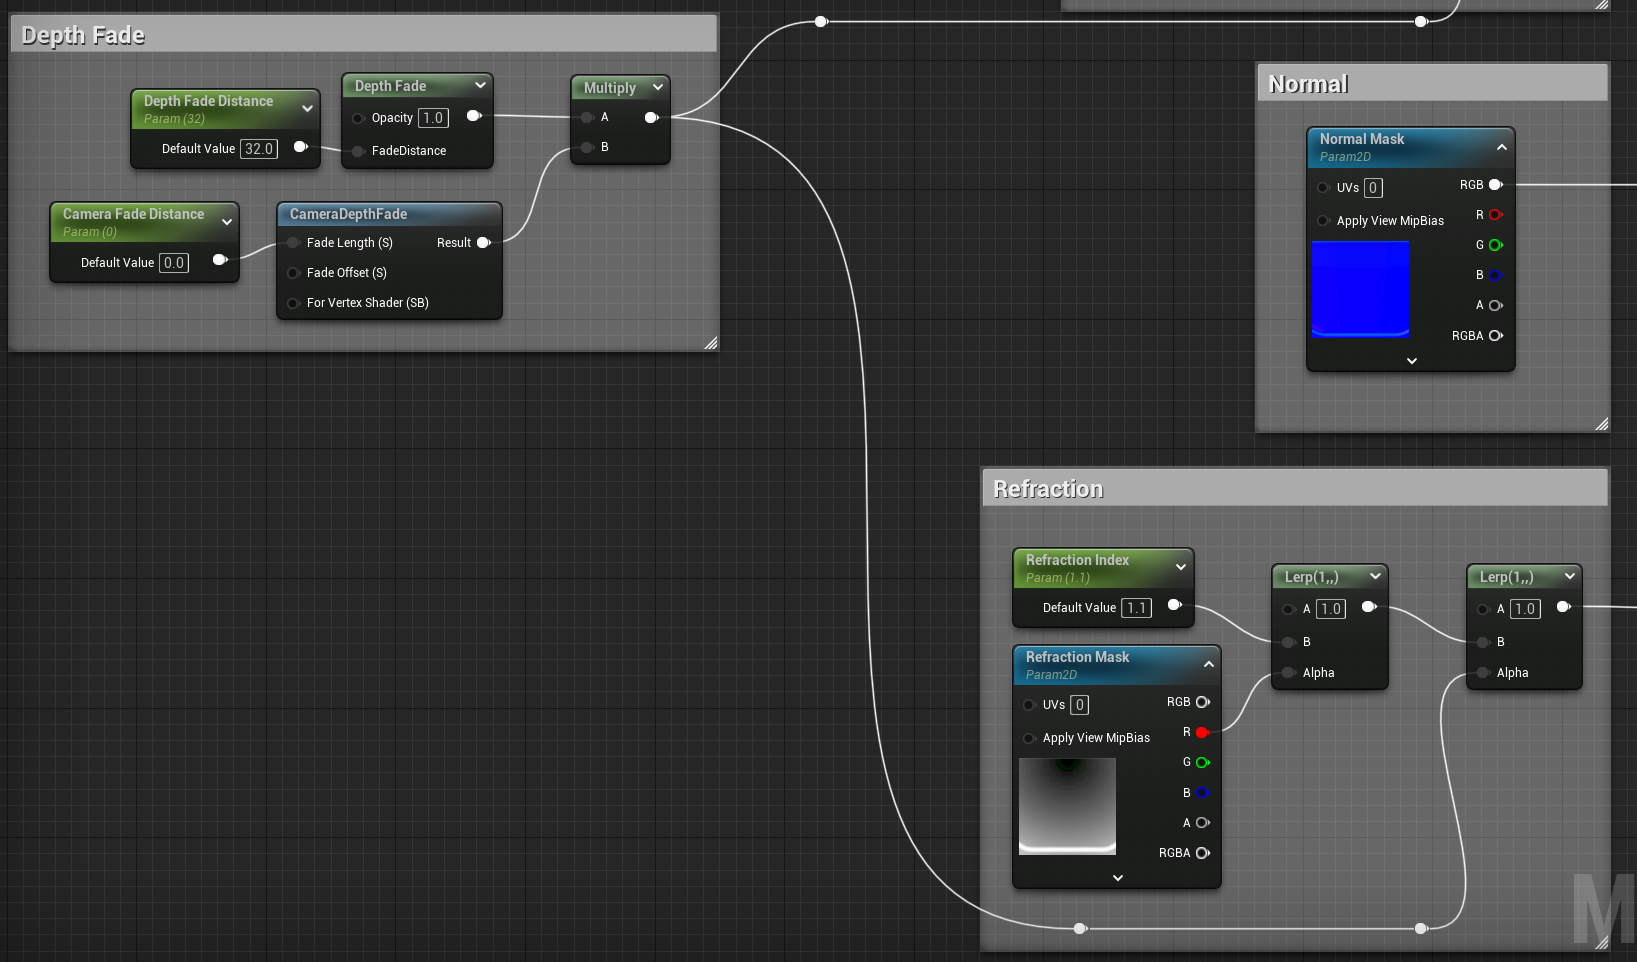
It's finally time to move to the engine! I'll be using Unreal Engine here as it's easy to get some nice looking refraction results quickly. The core of this material revolves around the Fresnel effect, which Unreal has some helpful utility functions for. Because we want to drive the emission and the opacity based on the camera direction, we'll use the Fresnel component to drive these properties. It will also be helpful to factor in a depth fade so that we don't end up with some unsightly seams between our bubble shield and the ground (or any other opaque object).
Animation
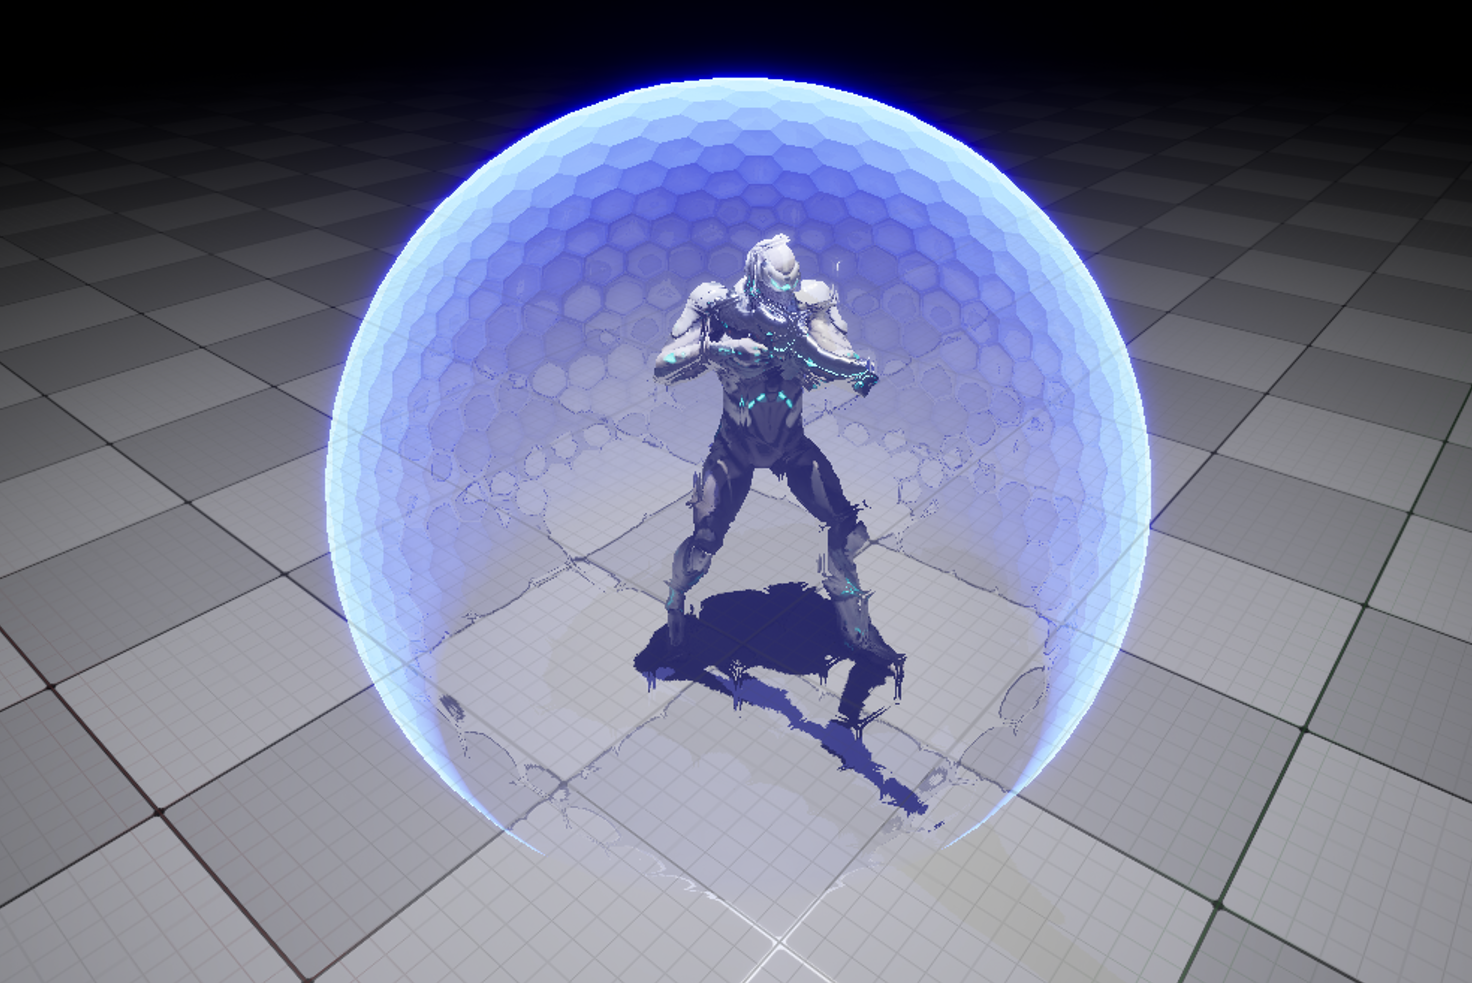
The above gets us to the image at the top of this page, which is close to the effect in Halo 3. One aspect I don't like about the original effect however, is that it just sort of poofs into existence. I think it'd be much cooler if the effect built up (or down) vertically, as if the shield was "spreading out" from an initial starting point.
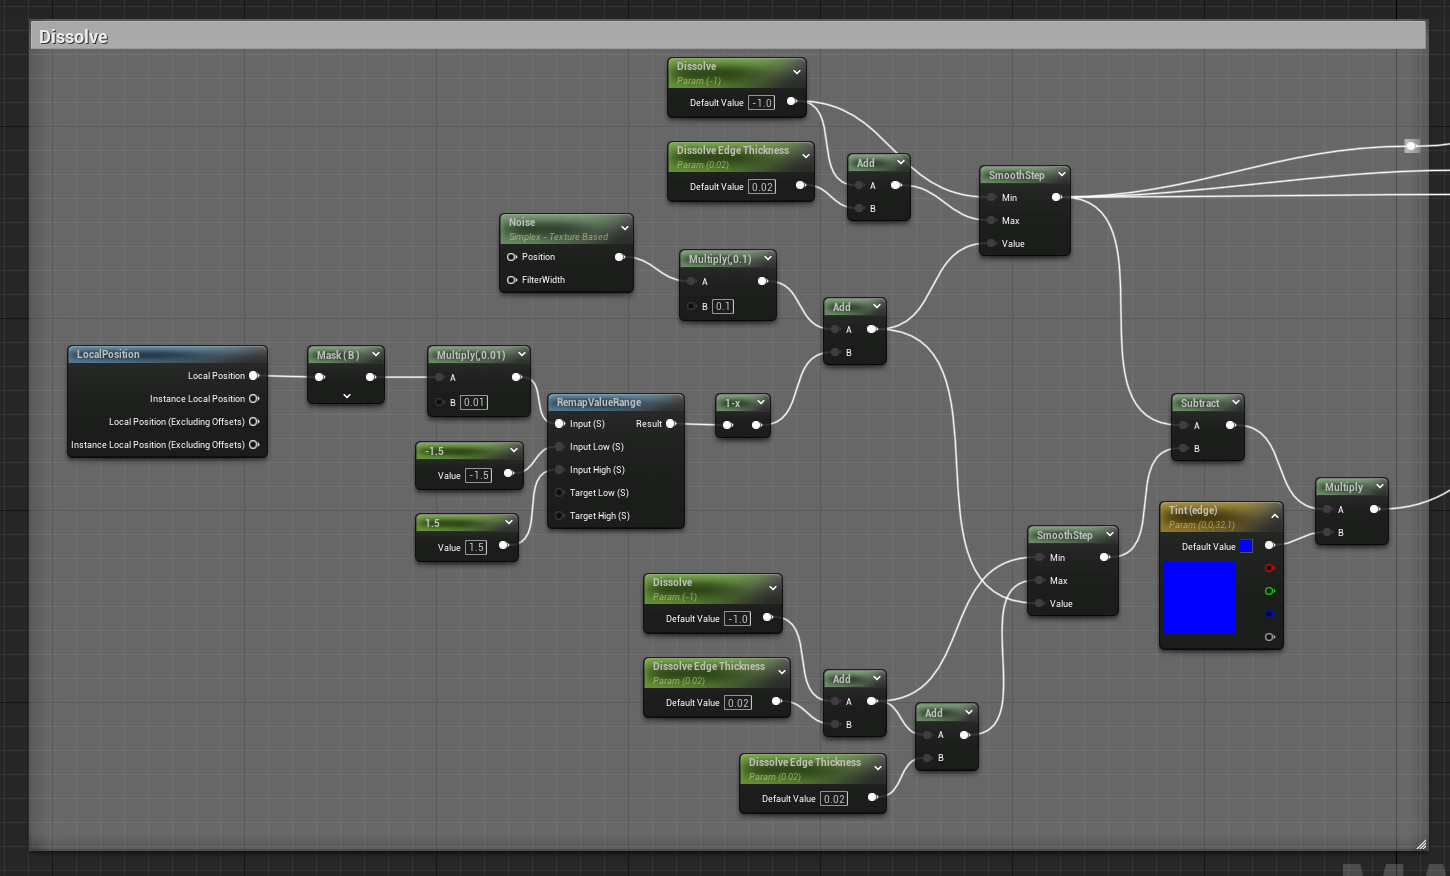
To achieve this effect I implemented a dissolve animation, tweaked to use the object's local up axis. There's a lot of artistic freedom here, but I think the effect looks best if we use a very low-scale noise as demonstrated in the final effect below. The output from the dissolve calculation needs to be factored into the emission, opacity, normal, and refraction which leads to a slightly messy graph unfortauntely, but I've tried to keep it as neat as possible.
All of that leads to the final effect! Due to the procedural nature of the workflow as well as the variety of exposed parameters, this effect can be significantly tweaked in-engine to allow for numerous variations in-game. Hope you like it!
The model being used here is Wraith from the Paragon assets made available by Epic.