Character Trail (Sandevistan)
Inspiration
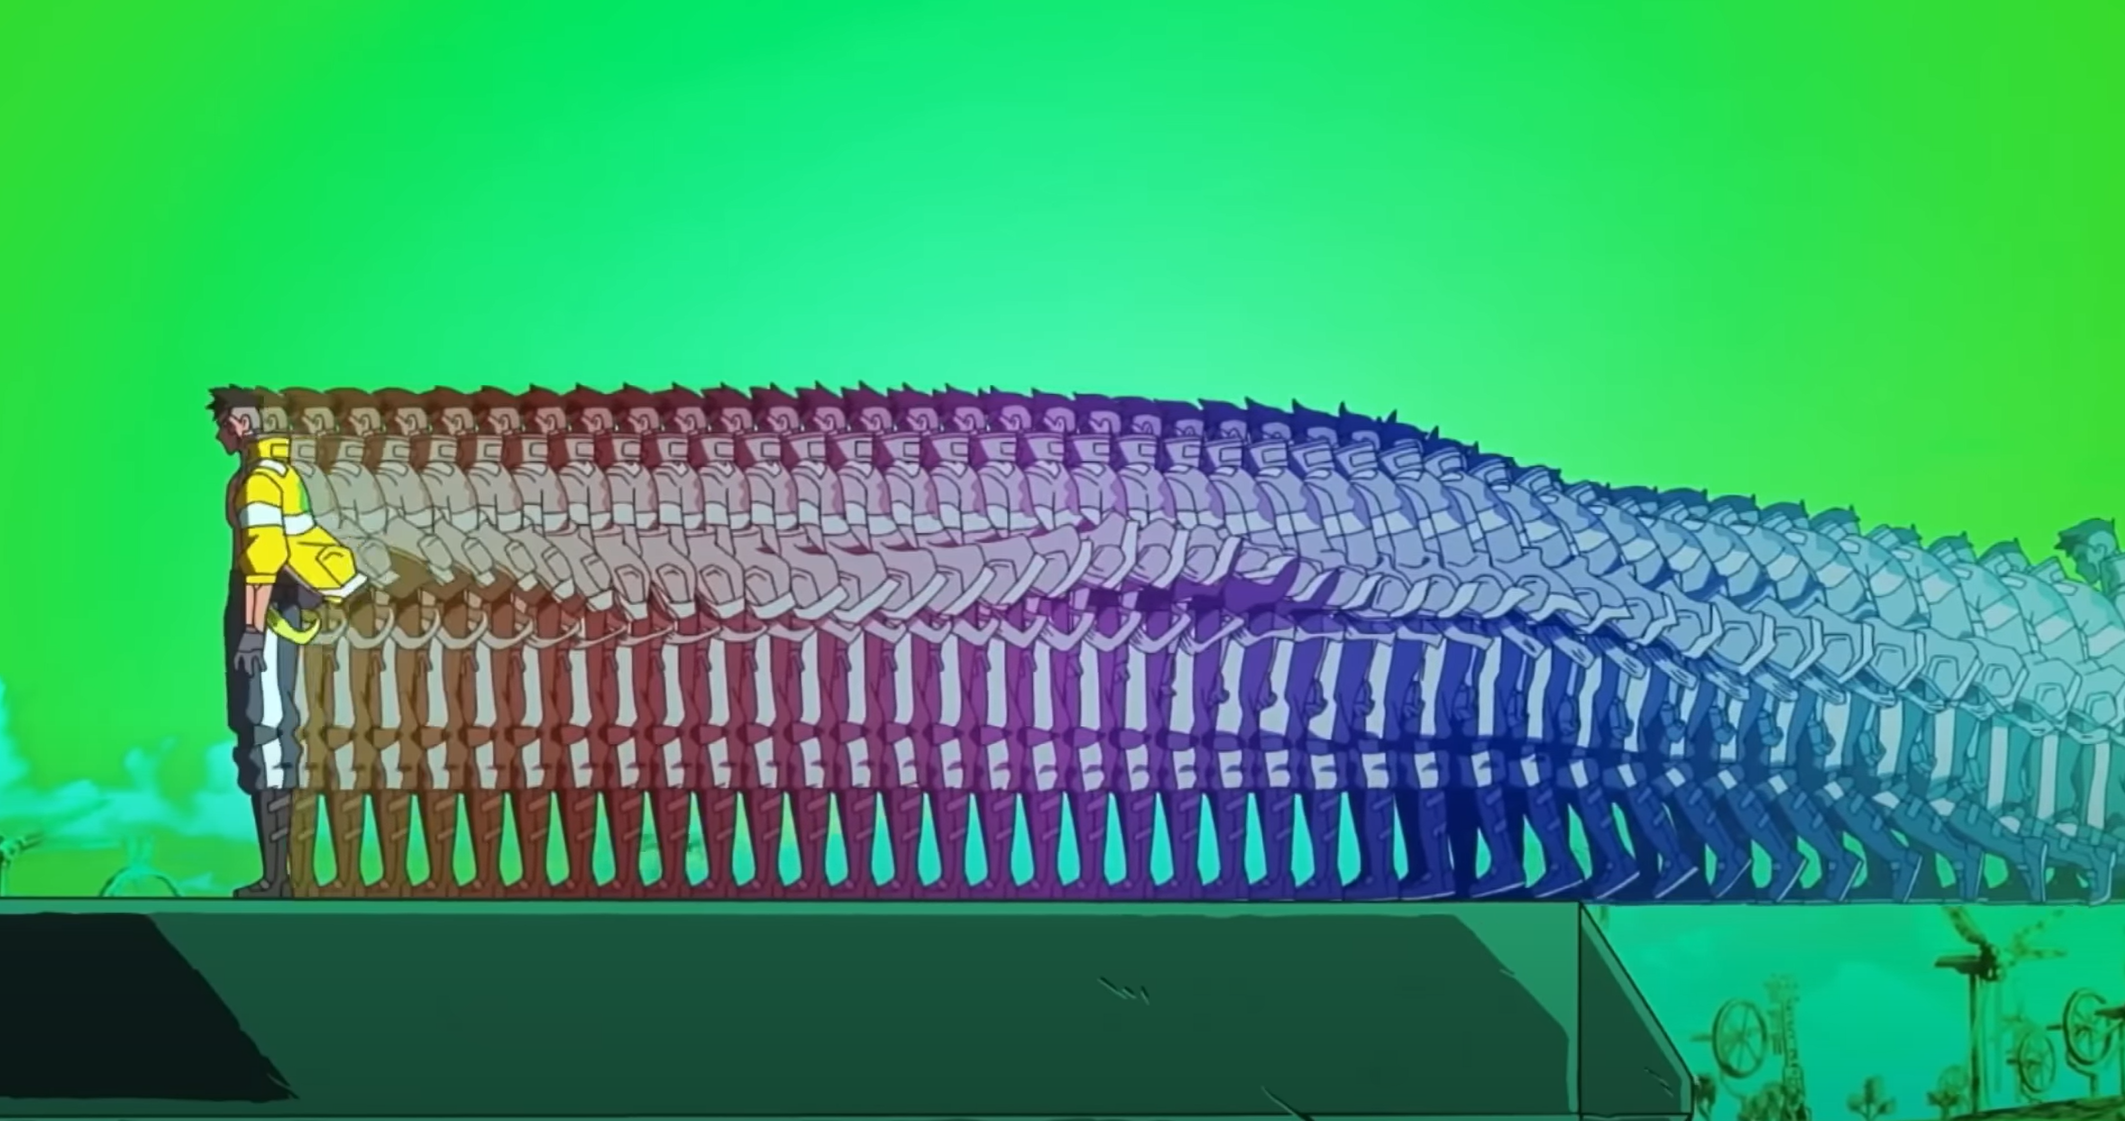
If you're not familiar with the Cyberpunk universe, the Sandevistan is a piece of technology attached to a person's spine that lets them move at incredible speed. For the purposes of the game Cyberpunk 2077, and the TV series Cyberpunk Edgerunners, this is often represented by the main character moving at normal speed while everything else moves in slow motion. In the game, the effect is portrayed through a simple color tint and fisheye post-processing effect. In the TV series however, the world around the user is tinted green while the user leaves "echoes" of themself as seen in the image below.

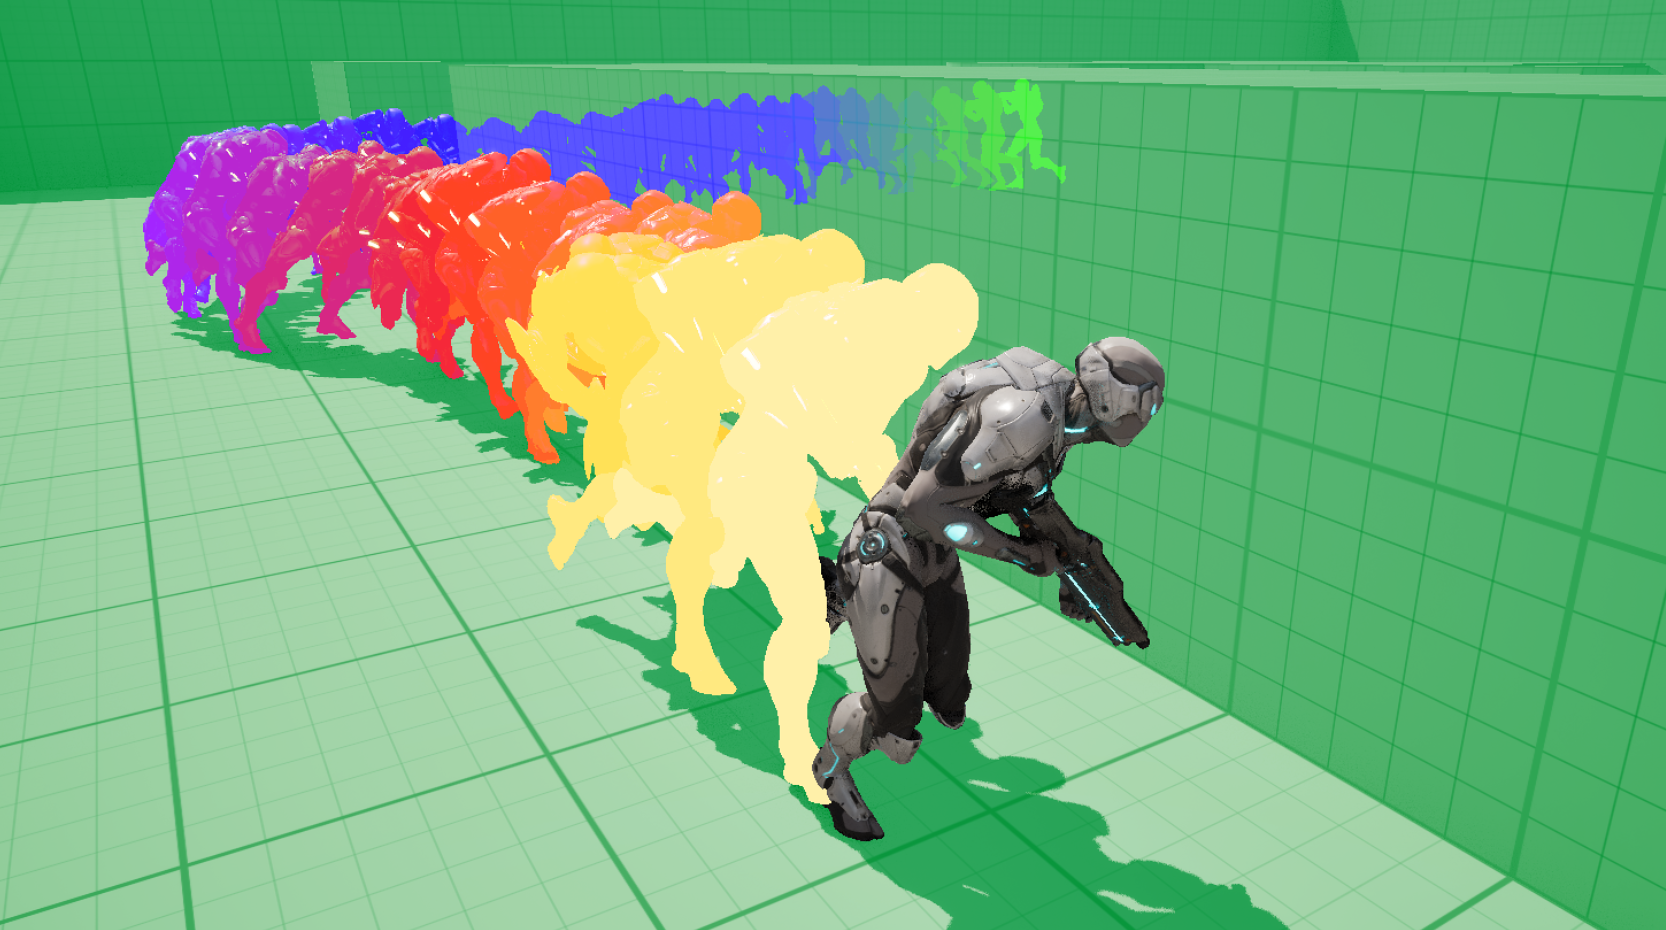
As you can see in the image above, but more clearly in the image below, these echoes change colour depending on how long after activating the Sandevistan they were created. Ones created immediately after are green, and then they shift to blue, purple, red, and yellow as use of the Sandevistan goes on. I thought this would make for a really interesting visual effect portraying time slowdown so I decided to recreate it in Unreal Engine.
Implementation
While there's not much out there on this specific Sandevistan effect, there are some resources for more generic character trail effects. I used these two YouTube videos to get started which gave me some interesting ideas. There are a couple of ways you could tackle this depending on the kind of effect you're going for and how much control you need over it. One graphically intensive way would be to attach a particle system to the player which bursts some number of particles sampled from the character's mesh every 0.1 odd seconds. This can create some really cool effects but you can imagine the performance costs for this starting to add up.
Instead the approach I went for was to spawn a new instance of a blueprint which had a poseable mesh on it, and copy the pose from the player character to the blueprint at the point of creation. Then to add the colour, use a post-processing material with custom stencil values for each "echo" instance. If that doesn't quite make sense then read on!
Creating the "Echoes"
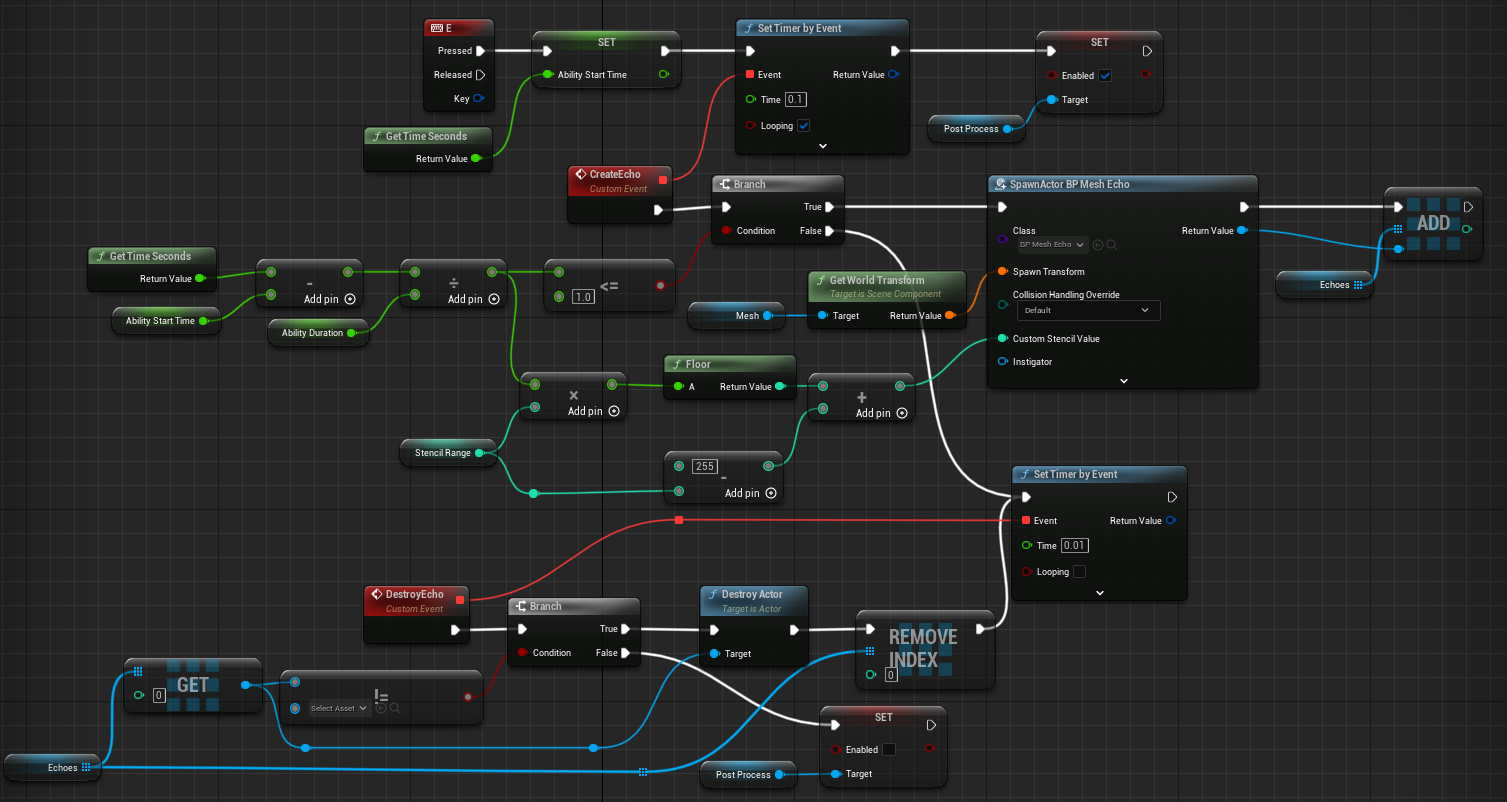
Hopefully you can see from the above blueprint graph that the echo creation and destruction isn't too complex (if you ignore the stencil values for now). For creation we simply record the start time of the ability, then start a loop using timers that will create a new echo every 0.1 seconds until the ability duration is reached. We add each new echo to an array so that we can destroy them one by one when the effect is finished. We want to stagger the destruction of the echoes slightly so that it creates an effect of the echoes "catching up" to the player, so we need another timer loop to destroy them one by one every 0.01 seconds.
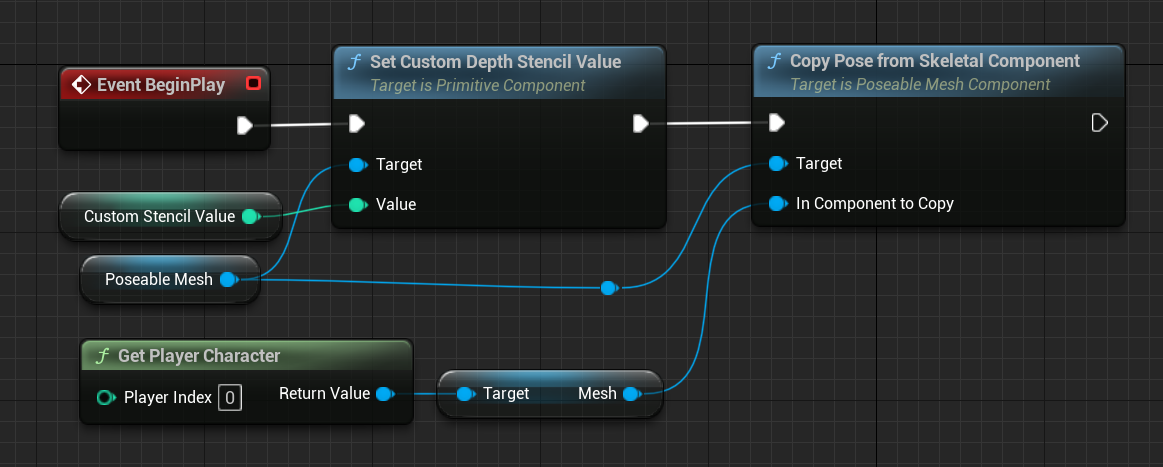
As for the logic within the echo itself, it's simply setting a custom depth stencil value and copying the pose that the player character is in at the point at which it's created.
Colouring the "Echoes"
The echo creation and destruction is relatively straightforward, but giving them the right colours is a little more complicated. Again there are a couple of routes you could go down here. Firstly, you could modify your materials (or your master material if using one) to allow a tint parameter which will influence the overall colour of the mesh. If your materials are sufficiently complex however, this may prove to be quite a difficult task.
Thanks to the magic of the custom stencil buffer in Unreal however, we can achieve the desired effect using post-processing instead. The way this works is that every mesh in the scene can be assigned a custom stencil value of 0-255 which can then be read from post-process materials. This allows targeting of particular post-process effects to particular meshes, which is just what we need! Unfortunately I couldn't think of a way to use the same stencil value for all echo meshes, so instead I greedily used up 50 of the 255 available values for the different echoes that get created. This value can of course be tweaked depending on what your other stencil buffer needs are.
Referring back to the blueprint graphs from the previous section, we can see that each echo is assigned a custom stencil value in the range 205-255 with echoes created towards the beginning of the ability being assigned values closer to 205, and echoes towards the end closer to 255. Side note: I could have also used values 1-50 instead of 205-255, but the latter just makes some of the material maths a bit simpler. Now given a range of stencil values, how do we map them onto the correct colours? Enter Linear Color Curves!
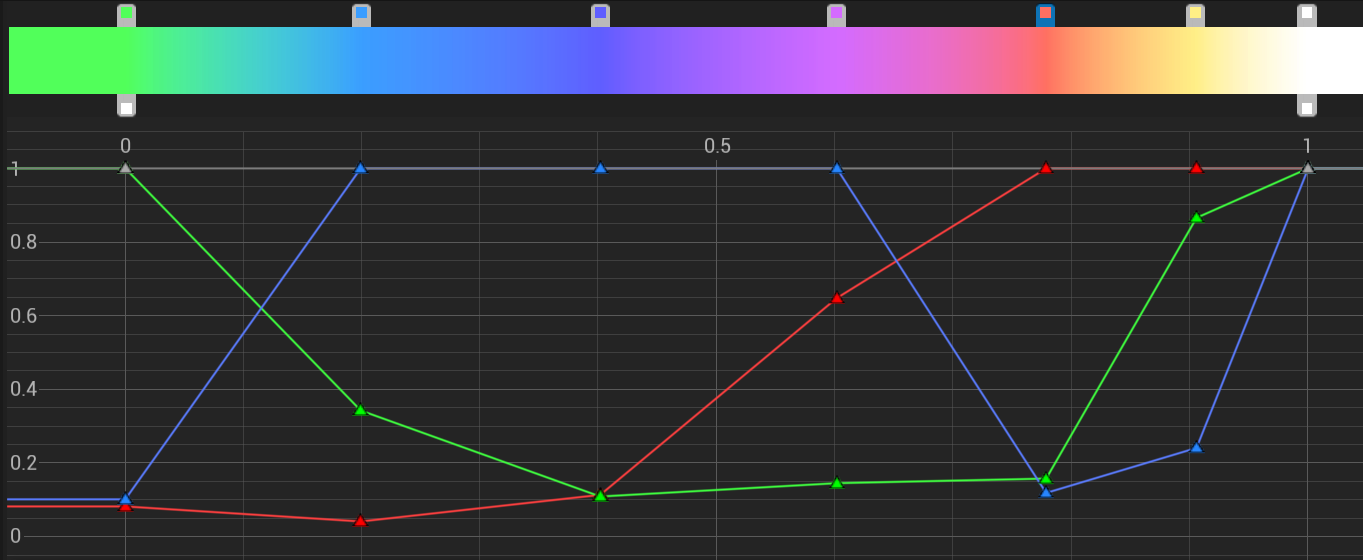
Linear Color Curves in Unreal allow us to easily define a gradient of colours that can be accessed from a material graph. If we map our stencil values to the 0-1 range then we can sample across the range of colours on the curve. The section of material graph below shows the relatively simple logic for grabbing the stencil value, checking if it's in the right range for us (205-255), sampling the colour curve and then blending the output on screen with this color.
Colour blending itself is a whole other topic, but luckily Unreal provides with a whole heap of utility functions for blending colours. As a result there's a huge amount of creative license here to choose something that looks interesting and gives off the desired effect. I personally went for a more vibrant colour mixing than in the TV series as I thought it looked much more interesting, but it can be easily tweaked.
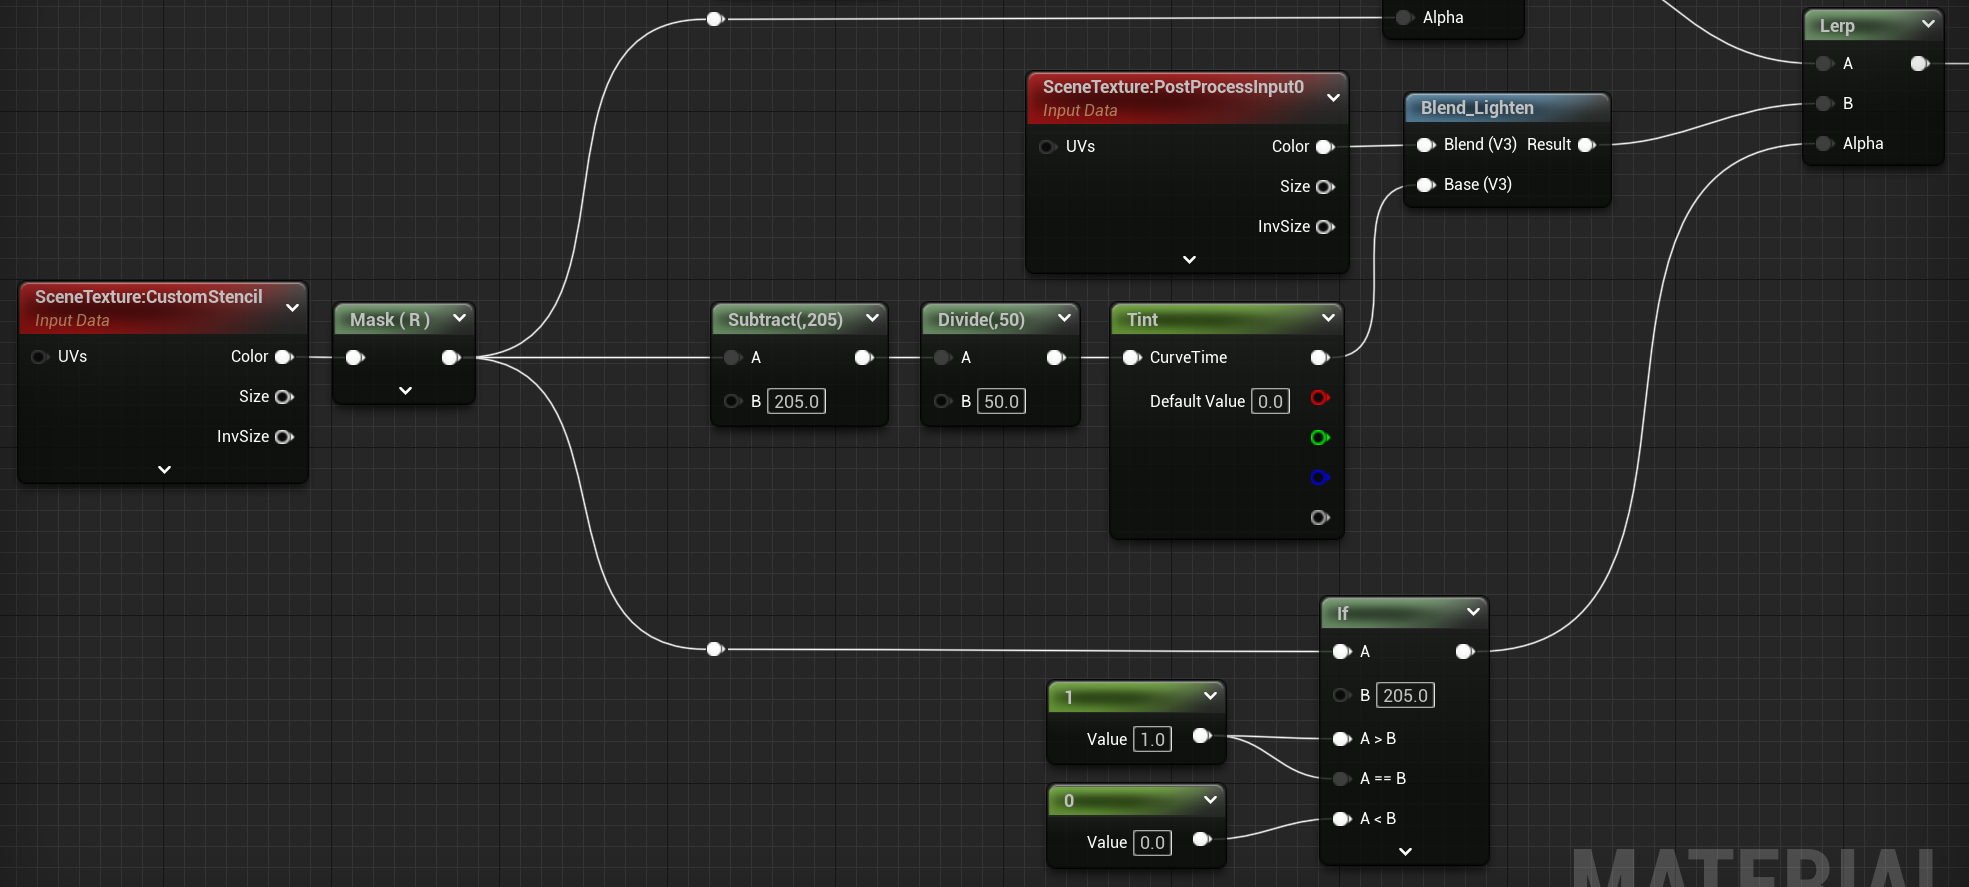
Because we're using stencil values here, the meshes will be picked up even if they are occluded by something else in the scene. I've left this effect in intentionally as I think it helps to give the player a better sense of where they started and where they've been while using the ability, but you could turn this off by comparing pixel depth to the custom depth texture if you prefer.
Colouring Everything Else
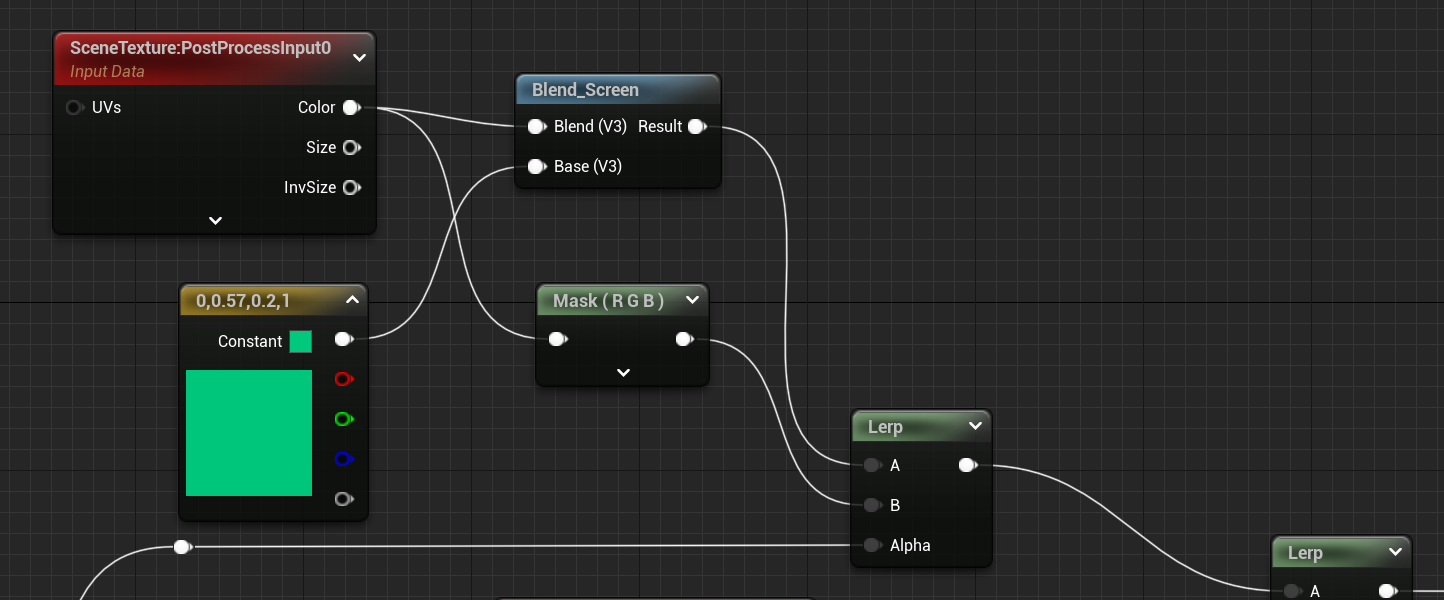
We've now got our echoes the right colour, but there are two more components to the effect. The first is colouring the environment with a green tint, and the second is leaving our player character its original colour. We can achieve this by giving the player character its own stencil value (I've gone with 1 here to simplify the logic but in principle you can use any value and check for it), and then outputting the original colour for this stencil value, with a blended green tint for everything else that doesn't have one of our specified stencil values. I used a different blend function here as I wanted the echoes to stand out more than the environment.
That's it! We now have a trippy effect for when our player slows down time. From a VFX perspective there are some interesting tweaks that can be made here. Firstly I think the early echoes being tinted green makes sense, as if they are somehow linked to the time at which the ability was started. Then to communicate the ending of the effect, we could move the echo colour into a deep red or even black, or what I've done here which is to push the colour towards white and thus closer to the original player character colour, as if time is catching up with them.